Does it ever happen, where you’ll take an image and what you see in your eyes is beautiful colours, and a few hours or days later, you start looking at the photographs you have taken, when you notice the colours look faded, or like there’s perhaps a bit to much white in them?
Well here’s the simple and quick fix for all you Photoshop lovers, and the honest truth is that you can likely do this in any graphics editing software that allows for you to edit “levels”.
1) Open your image in photoshop.
2) Click Image, then Adjustments.
3) In the Adjustments menu, select Levels
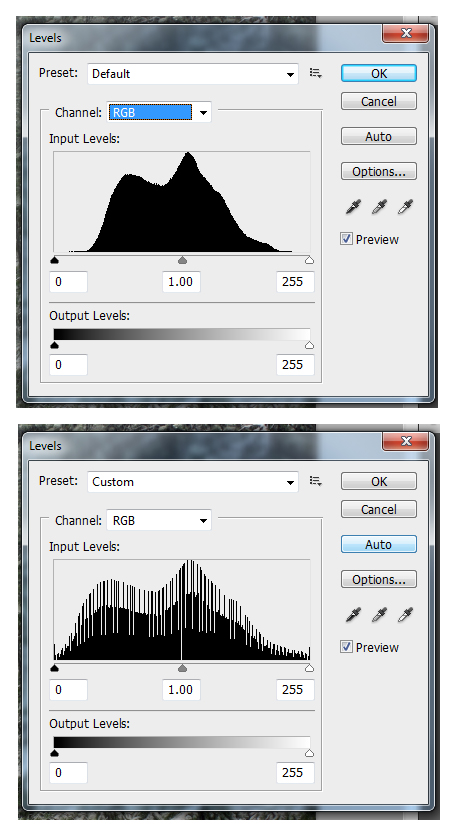
4) Now you will be presented with a small window that shows you the data for your Green Red and Blue light colours. This is known as a image histogram.
5) If you then press the button that says “Auto”, you will see that Photoshop automatically balances out the Red Green and Blue colours so that the cover the full colour spectrum, rather than being focused on very specific colours.
6) If you would rather discover the power of adjusting the images histogram manually, then you can move the small arrows, the one on the left controls your black point, the one on the left controls the white point, and the one in the middle controls the mid-tones of the image.
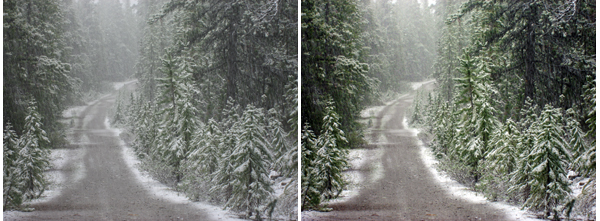
Above is an example of before and after, so you can visually see how significant the modification can be. On the left, no edit, and on the right, color correction has been done.
Tips:
So you need to know what works best with the histogram, how will this improve your images?
Well the answer is that an image will more often than not, look better if it utilizes the entire histogram